Gauge Bezel Installation:
Tools Used:
- Medium size long neck Philips (+) screw driver
- Medium size short neck Philips (+) screw driver
- Long nose pliers
Products Used:
|
|
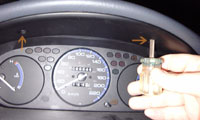
Using the short neck Philips screw driver, remove the two upper screws.
|
|
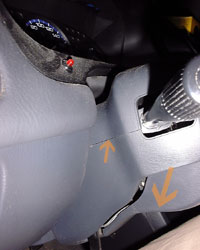
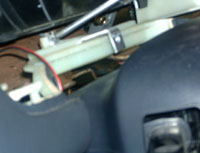
Using the long neck Philips screw driver, remove the two screws holding the steering column bezel. It is in two parts, so you'll need to pull them apart with a little force. Lower the steering column using the adjustment arm.
|
|
|
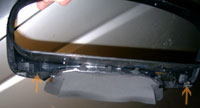
Pull on the bezel, putting more pressure on the bottom of the gauge bezel (see picture for OEM clip placement).
|
 The aftermarket bezel includes a metal bracket to fasten the lower part of the new gauge bezel. Use a long neck Philips screw driver to install it in the position indicated.
|
|
|
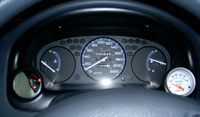
Next you must install the gauges before putting back the bezel. This assumes you've already run your wiring and/or hoses to properly operate the gauge. If your gauge uses electricity as well as being backlit, you can connect the lighting system to the gauge positive and negative, no need to run extra wires.
|
|
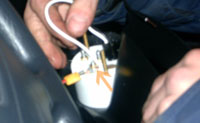
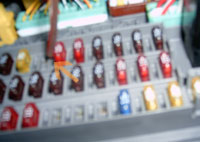
The steering column provides a good place to ground your gauges. You can use the positive wire of an unused accessory (like sunroof) in your fuse block. Use an accessory that only functions when you have the key in the ignition (unlike the hazards). This way, the gauge will only light up when you turn the car on.
|
|
|
Put back the screws to the gauge bezel, reinstall the steering column bezel, test that the gauges you installed continue to work!
|
|