Front Speaker Installation:
Tools Used:
- Medium size long neck Philips (+) screw driver
- Precision 1.5mm size flat head (-) screw driver
Products Used:
|
|
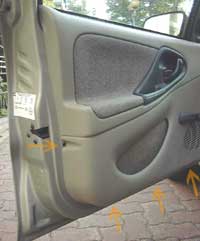
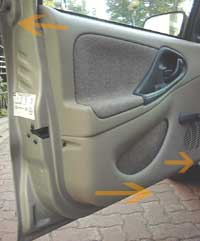
Remove these 4 screws using a medium sized Philips (+) screwdriver. |
| Remove these 2 screws using a medium sized Philips (+) screwdriver.
|
 |
|
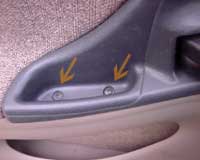
Remove this screw using a medium sized Philips (+) screwdriver. Remove
the small panel (no clips). Note that this screw is the only different
one, so don't worry about mixing things up. |
|
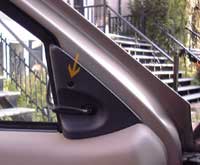
Here's a shot of what you will need to remove, note the shape of the
clip. |
|
|
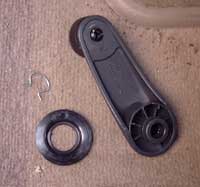
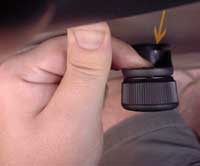
With a good amount of force, push on the door panel in the proximity
of the window knob. Using a small precsion flathead screwdriver, push
on one side of the window knob retaining clip. |
|
Pull on the panel starting from the bottom. Once all the clips are popped,
pull on the panel away from the vehicle to release it from the window sill. |
|
|
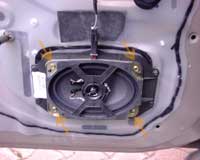
Note the GM speaker connector. You can either cut it or dismantle it.
You can now install 4x6" speakers into the factory bracket, or
remove the factory bracket and upgrade to 5x7" with little modifications.
Watch for window clearance by keeing the window down. |
|
Do all the above steps in reverse order and everything should look stock.
Always test your power window and power door buttons before securing the
door back into place (if applicable). You don't want to have to undo everything
for a simple wire harness. |
|
|