Rear Speaker Installation:
Tools Used:
- Medium size medium neck Philips (+) screw driver
- Short nose pliers
- Clip removing tool
- Eletric welder
- Shrink tube (or eletric tape)
- Silicone (or hot glue)
Products Used:
|
|
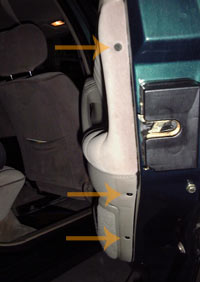
Using a medium sized Philips screw driver, remove these three screws.
|
|
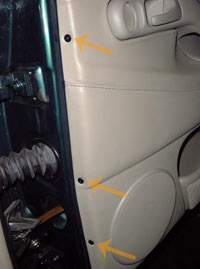
Using a medium sized Philips screw driver, remove these three screws.
|
|
|
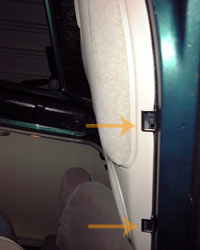
These two clips are supposed to act as some sort of hinge to fold the door panel down. Unclip the door panel from them, it should be fairly easy.
|
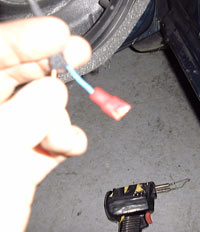
Disconnect the speaker connector.
Cut the speaker connector and weld on a pair of quick disconnect terminals that are compatible with your aftermarket speakers.
|
|
|
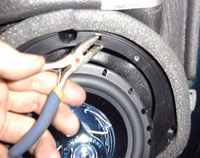
Remove the stock speaker.
In order to bolt and aftermarket speaker, you will need to remove this tab. Aftermarket speakers screw in perfectly to the stock mounting points.
|
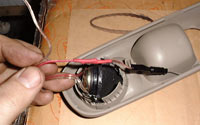
Remove the tweeter's casing to allow fitment into stock location.
To avoid extra wiring, we trimmed down the aftermarket tweeter's long wiring and sealed it with loom tube.
Reassemble the door following the above instructions in reverse order.
|
|
|
Weld and seal with loom tube the aftermarket tweeter to the stock harness.
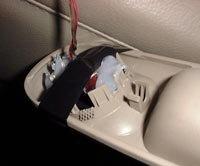
In order to seat the aftermarket tweeters in the stock location, we used silicone to fill in the little gap.
Wait for the silicone to dry. We used electric tape to make sure the tweeter doesn't unseat while drying.
Wait for silicone to dry and follow the above instructions in reverse order to reassemble the door!
|
|