Front Speaker Installation:
To access the front door speakers, you must remove the door panel.
Tools Used:
- Medium size long neck Philips (+) screw driver
- Medium size short neck Philips (+) screw driver
- Long nose pliers
- 3M 2-way tape
Products Used:
|
|
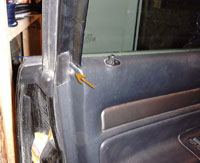
This is a tricky screw to find and can be removed first.
|
|
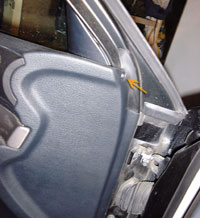
Another hidden screw.
|
|
|
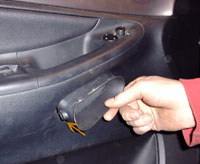
This screw requires a short screw driver. The inner door handle must be removed from the bottom.
|
|
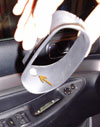
Two more to go.
|

|
|
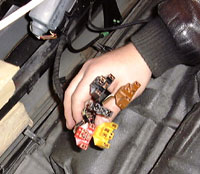
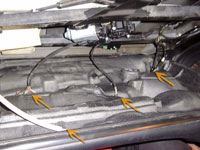
Disconnect all the wire quick connects as well as the door handle mechanism. Take note of their
placement, as the quick connects are the same shape, only differing in color.
|
|
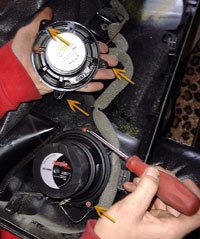
In order to make things differently and make installer's lives difficult, Audi chose to put
only 3 screws for the 5 inch speakers. The screw indicated by the screwdriver was used to wedge
the speaker in place.
|
|
|
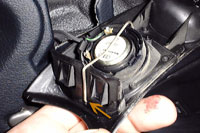
Remove the metal pin bracket holding the 1 inch tweeter in place using a pair of pliers. Avoid
cutting yourself in the process...
|
|
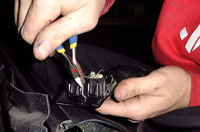
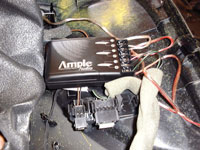
There isn't much room the crossover. The stock system uses a simple small capacitor to filter
the frequencies. There's just enough room by the connectors. Use 2-way tape to secure it in place.
Once the isolating foam in place, you don't want the crossover to move when putting the door
back into place.
|
|
|
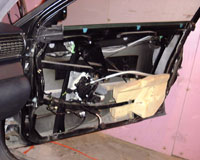
Reinstall the door panel making sure the crossover clears the reinforcement bars and electric
window motor. As always, once the panel in place, test the door controls to make sure everything
works!
|
|